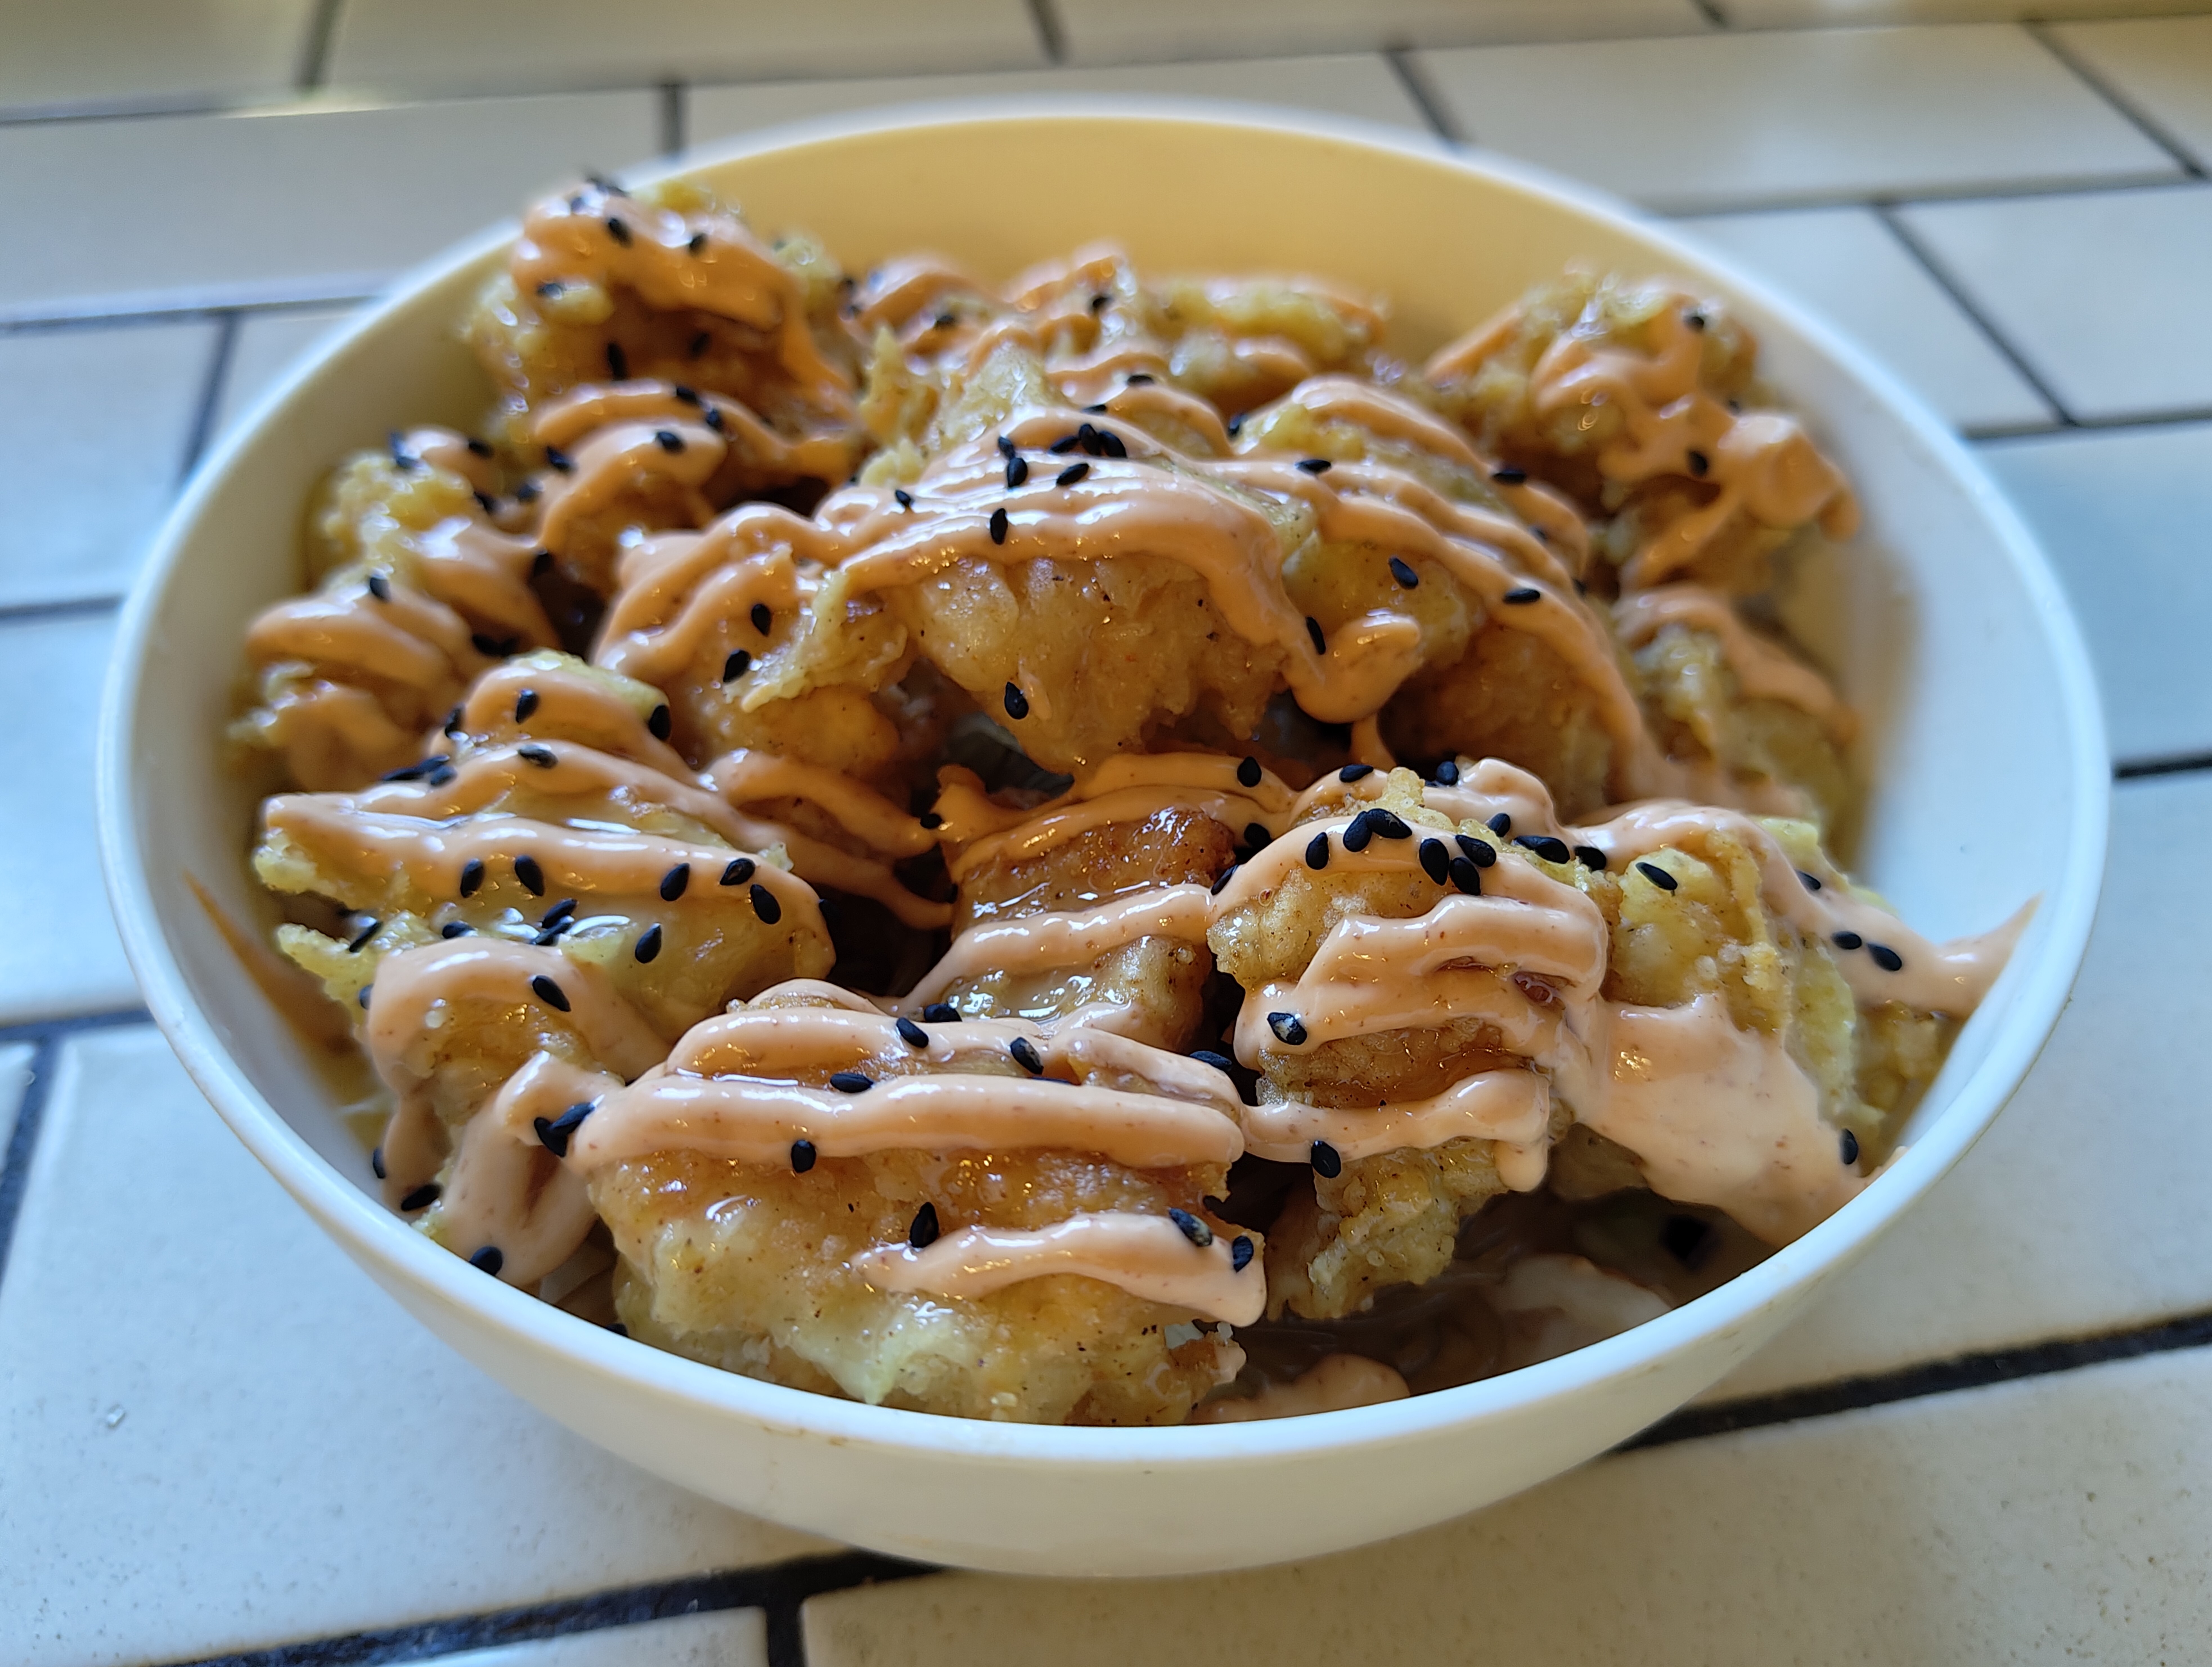
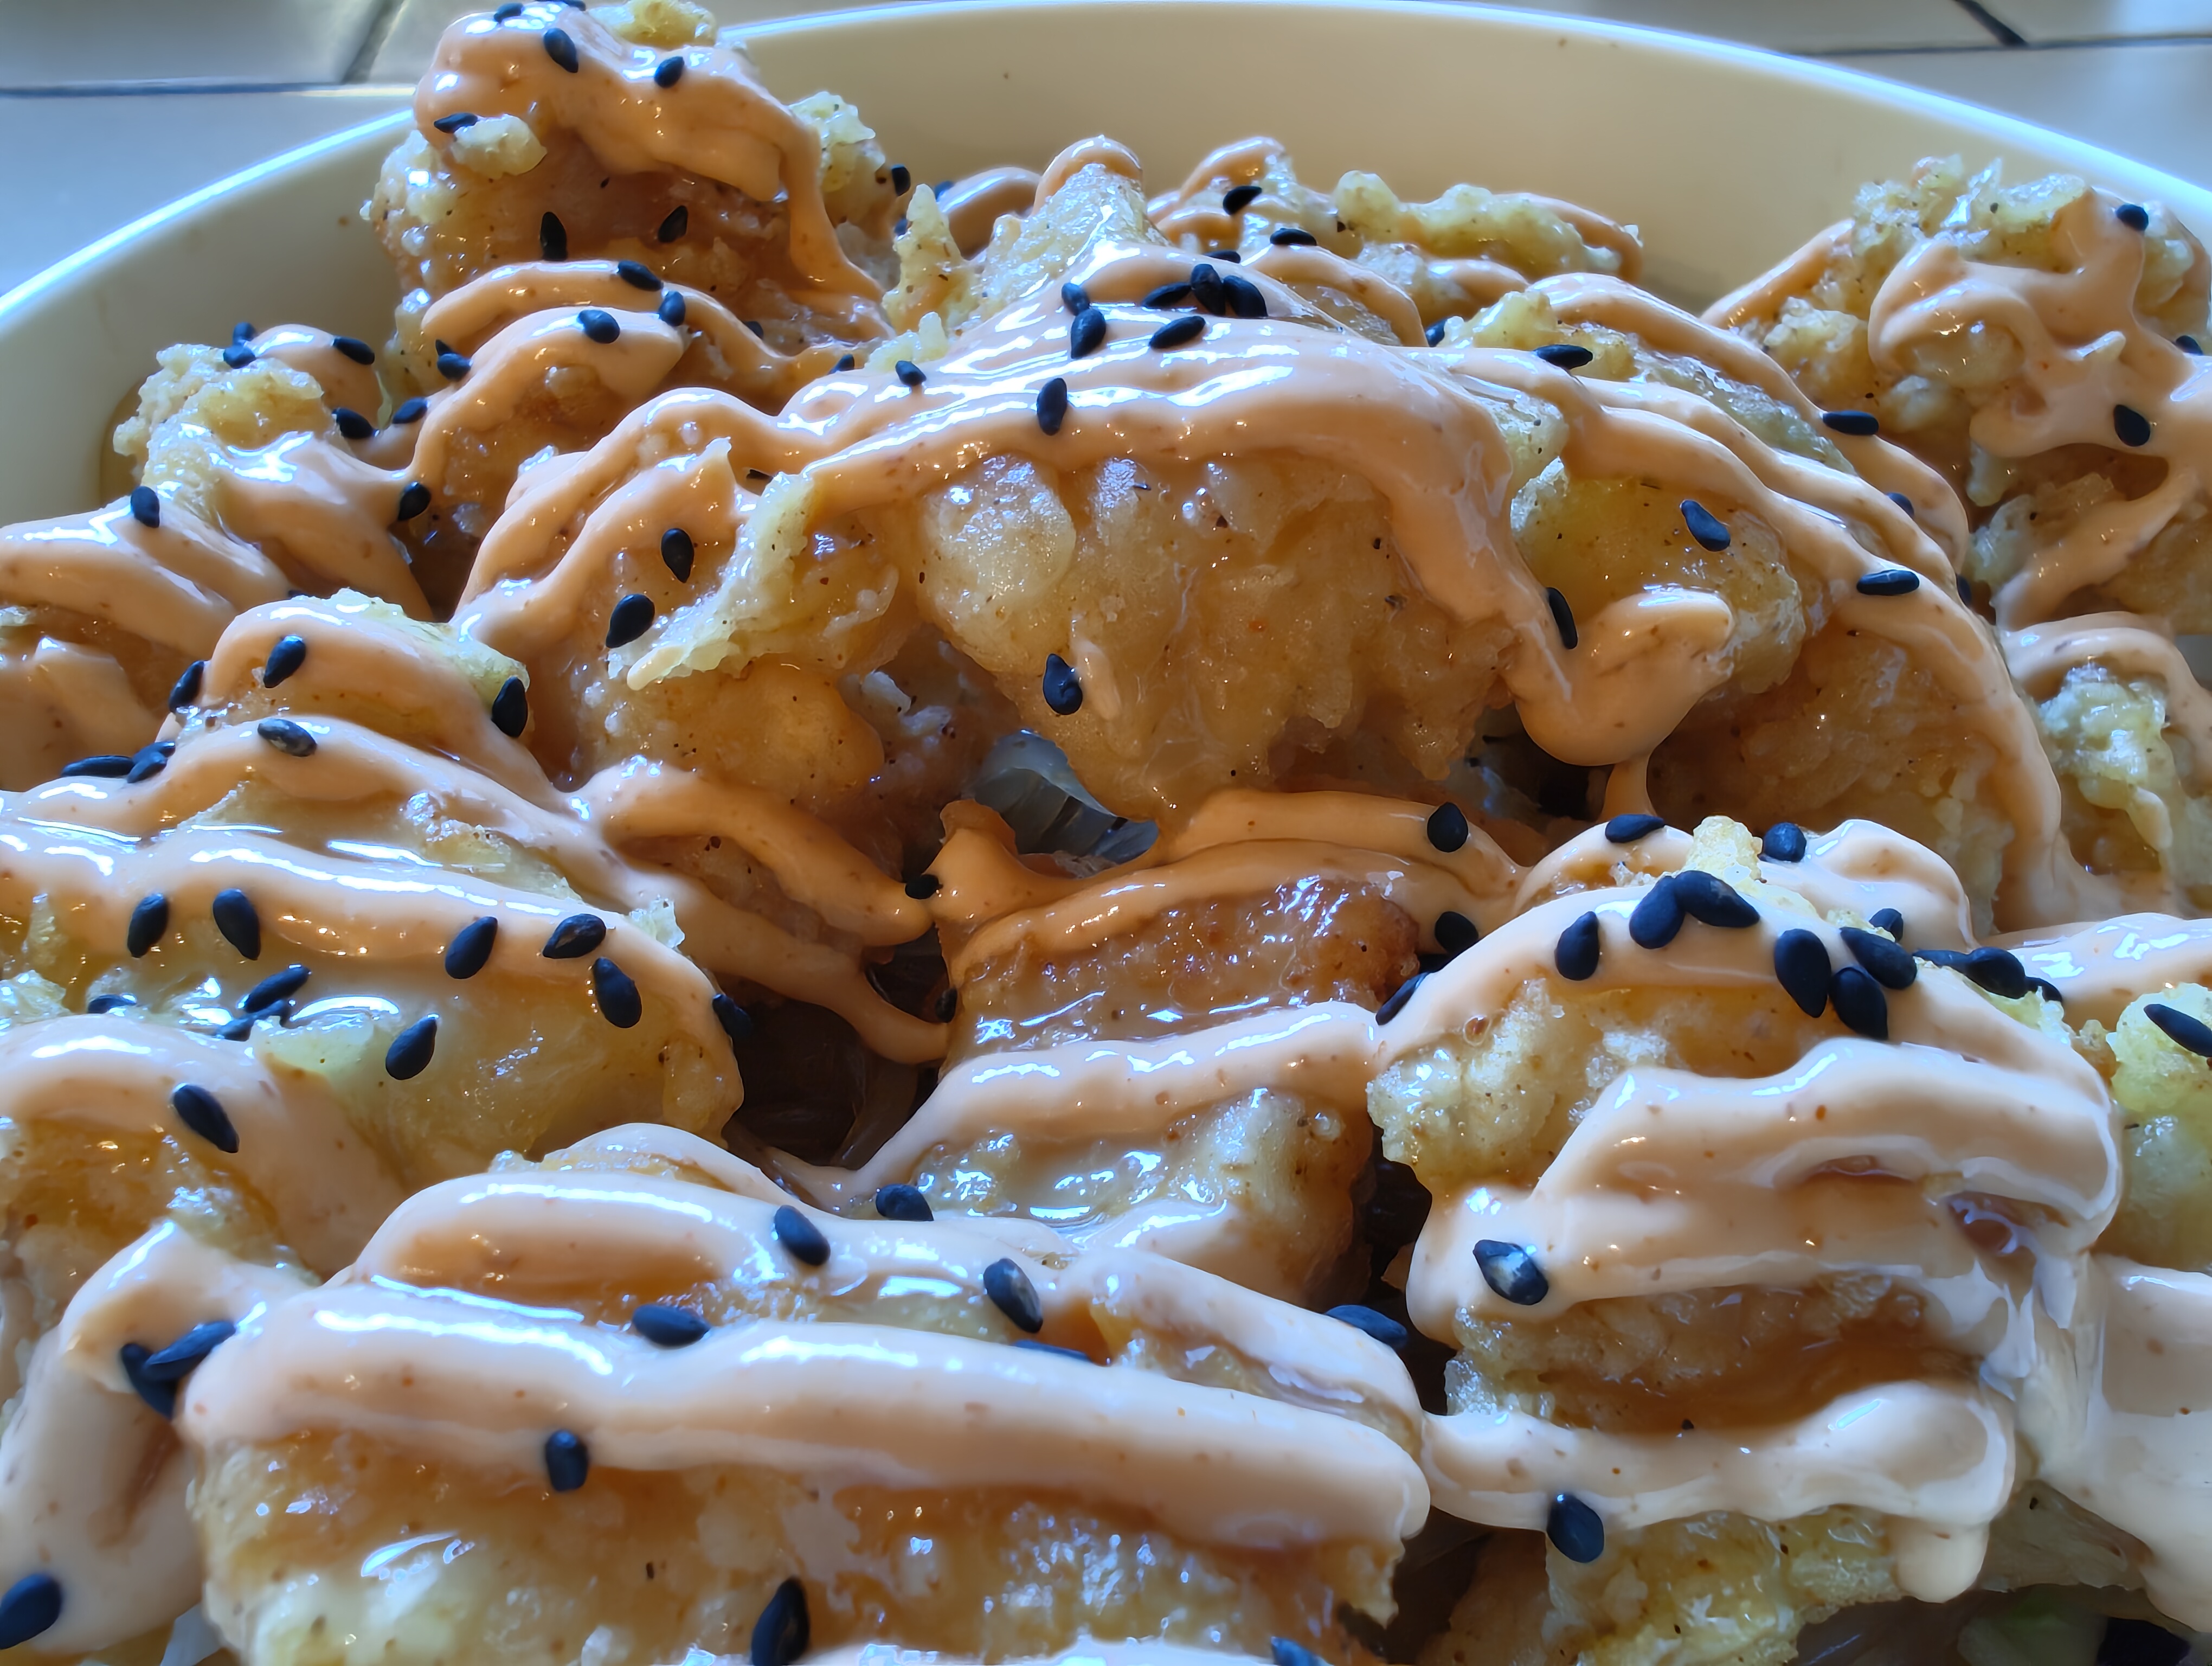
This is for the UglyBop with heat level 4.
Layers guide
- Rice
- Cabbage/lettuce mix
- Sweet Potato Noodles (AKA japchae, or glass noodles)
- Korean fried chicken. Can also do pork or beef.
- Black and white roasted sesame seeds, spicy mayo, and white lime sauce.
Be generous with all sauces, but not so much it puddles at the bottom. Cupbop’s sauces make the dish.
Note: below a level 4 has less spicy mayo. Above has more. Higher levels have more sriracha and potentially sambal oelek sauce (as practice with Cupbop, reduce soy and ginger, and add mayo and sugar).
Sauces

I highly recommend going to Cupbop and ordering extra sauce with your dish, but in small containers on the side. They’re happy to do it. I paid a buck for each added sauce on the side. This will help you get the flavor right when you make it yourself, if you’d like.
White Lime Sauce
- 10 Tbsp Mayonnaise
- 3 Tbsp Lime juice
- 8 Tbsp corn syrup (or confectioners/powdered sugar). Corn syrup is a little more accurate to the flavor than powdered sugar. Start with less, mix, and taste as you go.
I’ve compared this with their official sauce. With minor variation it’s spot on. Their white sauce has a gentle yellow hue to it, so I’m certain they use corn syrup or high fructose corn syrup instead. With powdered sugar though you can get pretty close. Just mix the ingredients, and if it’s too tart, add more sugar. If it’s too sweet, add lime. If it tastes too much like mayo, add the other two ingredients. You get the idea. It should be a generously sweet sauce.
Feel free to double the recipe, but this should be plenty for a few people.
Spicy Mayo
- 1/2 cup mayonnaise
- 6 tsp Sriracha hot sauce
- 1/4 tsp garlic powder
- 1 tsp lime juice
There’s room for play here. If it’s too spicy, add mayo. If there’s not enough kick, add sriracha. Keep in mind this sauce it meant to be applied heavily, and you’ll be putting a lot of it on the final dish. Basically, it should be mild unless you want it spicier than a level 4.
Also, feel free to double or triple the recipe, but this should be enough for 2-4 people (it makes more than the white sauce recipe does).
Bulgogi Sauce
I recommend making this vs buying Bulgogi sauce. They call it “Bulgogi” when I ask, but it’s much closer to certain Korean BBQ sauces you can find. I bought some Bulgogi from an Asian store, and the flavor profile isn’t quite the same. It’s way too strong in flavor. Cupbop has more of an Americanized version that’s sweeter and less overwhelming with the other flavors.
Simple Method
Here’s what I’ve done:
- 3/4 cup soy sauce
- 3/4 cup apple juice (pineapple and pear also work)
- 3/4 cup brown sugar
- 5/8 tsp garlic powder (times by 1.5 if you want to match the peppery heat from Cupbop’s bulgogi sauce)
- 1/2 tsp black pepper
- (optional) 1 inch of grated ginger, or a tsp. Probably less. I found I didn’t have ginger when I made this, and since then I haven’t bothered to add it and it’s great. Ginger in an authentic quantity is kryptonite, so if you decide to try it, start with a small amount.
- (optional) I haven’t tried this yet, but thickening the sauce using corn starch or an extended low simmer on the stove would do wonders by making it a little thicker.
Advanced Method (sort of)
The ‘bibigo’ brand of Korean BBQ - Marinade & Sauce - Original comes pretty close. It’s a little thicker, but the flavor works well. If you mix this 50/50 with the homemade sauce above, it’s spot on. If we’re in a pinch we’ll just mix this with some pear juice and call it a day.

Korean Fried Chicken
(Inpsired in part by this recipe)
This is what we’ve bought for years. Lately, however, we can’t find it online or in our Asian Markets anymore. If you find it, hoard it.

This is our replacement. It’s not exactly the same but it seems to work well.

This method matches Cupbop’s texture of fried chicken. There’s a link to a recipe here you can pull from (exclude the sauce bit, although if you can figure out the Rock Bop sauce, this is how you could apply it).
1 - Dice raw chicken breasts
2 - Wet Mix
- 1 part fry mix
- 1 part chicken stock (or water with bouillon)
Mix together until it has the consistency of batter. Put in diced raw chicken. Submerge and properly coat all chicken.
3 - Dry Mix
For every 1 1/3 cups of fry mix, add the following:
- 2 tsp Paprika
- 1 tsp EACH: Oregano, Salt
- 1/2 tsp EACH: Onion Powder, Garlic Powder, Cayenne Pepper
- 1/4 tsp Black Pepper
Put the battered chicken into the a large container with the dry mix. Put the lid on and give it some good shaking to coat the battered chicken with the dry mix.
4 - Fry it
- Bring your neutral oil of choice (like vegetable oil) to 350°F
- Cook your chicken in batches, removing from oil when the internal temperature of the thickest pieces are 165°F.
For other meats
I haven’t tried pork or beef yet, but I’d suggest cooking in whatever way you know best, and consider making a bulgogi or Korean BBQ marinade (with reduced soy sauce and ginger) to use in the process. A slow cooker on low could produce pleasant results.
Other Recipe Components
Cooked white rice
Whatever brand or method you prefer. It’s just rice. If you’d like, you can mix in some bulgogi. Not necessary but if you’re a saucy kind of person there’s no judgement from me.
Cabbage/lettuce Mix
This consists of the following:
- Shredded lettuce
- Thinly shredded cabbage (ratio of like 4:1, lettuce cabbage)
- (Optional) shredded carrots.
Alternatively you can buy a bag of tri-color coleslaw mix.
Sweet potato noodles (one typical small bag makes enough for three people).

- Boil it for 6 minutes, then rinse with cold water (weird, but that’s the instructions on the packaging)
- Heat up a wok (medium at least) containing the modified bulgogi sauce
- Throw in the noodles, give them a good toss and cook for a few minutes. This adds great flavor and softens the noodles.
Note: if your noodles come out Al Dente at the end, try boiling them a little longer next time. CupBop likes their noodles less chewy more soft, so more time on the stove may be needed to replicate that.
Note: Rice noodles could be used as an alternative, but I can’t speak to that as I haven’t tried it.
Make the thing!
Refer to my layers guide at the top. Rice and meat should be served hot. Enjoy!
Alternatives and Substitutes
Glazed Spicy Chicken
For an amazing twist, and a bit more spice, try glazing your chicken using this recipe. I kid you not, it’s worth every extra second of preparation. Just throw the sauce ingredients together, heat it up in a wok, and toss with the cooked chicken. Serve as normal.

Rock Bop
I don’t know exactly what glaze they use for the chicken, but its flavor resembles the modified bulgogi.
Tempura Batter
Do not use tempura batter! The flavor does not work with the dish.
Teriyaki Sauce
and why it’s not it
- You can use Teriyaki sauce instead of Bulgogi sauce (many of the ingredients of the sauce overlap), but I really don’t recommend it. The problem is that the flavor doesn’t necessarily mix as well with the other sauces. It’s too gingery. You may be disappointed if you go with it.
- The real Cupbop bulgogi sauce is somewhere between authentic bulgogi and teriyaki, but with much less ginger and soy sauce (plus sodium). The recipe above is a much better representation of the actual sauce.
Mochiko chicken
instead of Korean fried chicken.
Hindsight is 20/20. Mochiko Chicken is incredibly tasty, but isn’t 100% Cupbop. If you’d rather, instructions for authentic Korean Fried Chicken are both; less work if you can find the ingredients, and matches Cupbop’s style more closely.

Your standard flour/panko/egg mix isn’t quite it either. If you want something sweet and crunchy.
- 1/4 cup mochiko flour (Japanese sweet rice flour) . Do not use real flour.
- 1/4 cup cornstarch
- 1/4 cup sugar
- 5 tablespoons milk (or buttermilk, or technically water). Original recipe asks for soy sauce instead, but Cupbop’s isn’t quite as flavorful. If you want more chicken flavor, definitely go with the soy sauce. Marinating here is meant to tenderize more than add flavor, but the green onions and bit of sweetness are nice.
- 2 eggs
- 1/4 cup finely chopped green onions, reserve some for garnish. Optional, I skip this one.
- 2 pounds boneless, skinless chicken thighs
- Oil, for frying
- Salt for taste
- Cube your chicken into cupbop size.
- Mix the first six listed ingredients then put in a sealable bowl or gallon ziplock bag. Stick the cubed chicken in there, and let sit overnight in the fridge, or at least for a few hours.
- When ready, preheat your oil in a high-walled pan or pot to 350°F.
- Add extra mochiko flour to a bowl, and coat each piece of chicken in it. This will make it crispy and crunchy after cooking.
- Cook a handful of your chicken cubes at a time, flipping partway through (unless completely submerged), until internal temperature of the chicken is above 165°. The mochiko flour exterior doesn’t brown much, but you can brown the flayed edges a little.
- After transferring your chicken to a cooling rack (or plate covered with a double layer of paper towels), salt it! The chicken needs salt, and this seems to be the tastiest place to add it. If you want instead, you can experiment by adding it to the marinade or at another stage in the process.
Air Fryer
If you’d rather fry your chicken in an air fry (as opposed to oil), the process is similar.
Skip the first two steps unless going the mochiko route.
- For the batter, times the mochiko flour and corn starch by 1.5.
- Don’t double coat the meat in mochiko flour from step 4. The meat needs to be wet, and a dry exterior will burn.
- Fill your air fryer with a single layer of chicken. Careful with runoff, as it will clog the holes and prevent hot air from circulating.
- Cook at about 400°F for 8-10 minutes, or until internal temp of your biggest piece is 165°F. Flipping halfway through for even browning. If the exterior burns before the inside cooks, lower your temperature to about 340°F.
Frying chicken in oil just hits differently, but isn’t as healthy. This meal already has superfluous amounts of sugar, so it isn’t trying to healthy by any means. You can embrace that, or try air frying instead.
Tips
If you don’t have a wire spider strainer skimmer, use metal salad tongs instead to transfer chicken to and from the oil. If you own a wire spider strainer skimmer, all the better!
When frying, use a high walled pot. This will prevent splashes.
Don’t overfill your pain with oil. Remember the oil level rises quite a bit when you add the chicken to it.
After frying, let the oil cool over night or until cool, then strain into your oil container (or new container). If you don’t have a way to strain it, funnel it in and let it sit. All the extra flakes and brown stuff will separate and clump at the bottom. Either way, you’ll be able to reuse your oil for cooking in the future. For chicken you can reuse the same oil up to about 3 times, depending on how messing your got with the cooking.
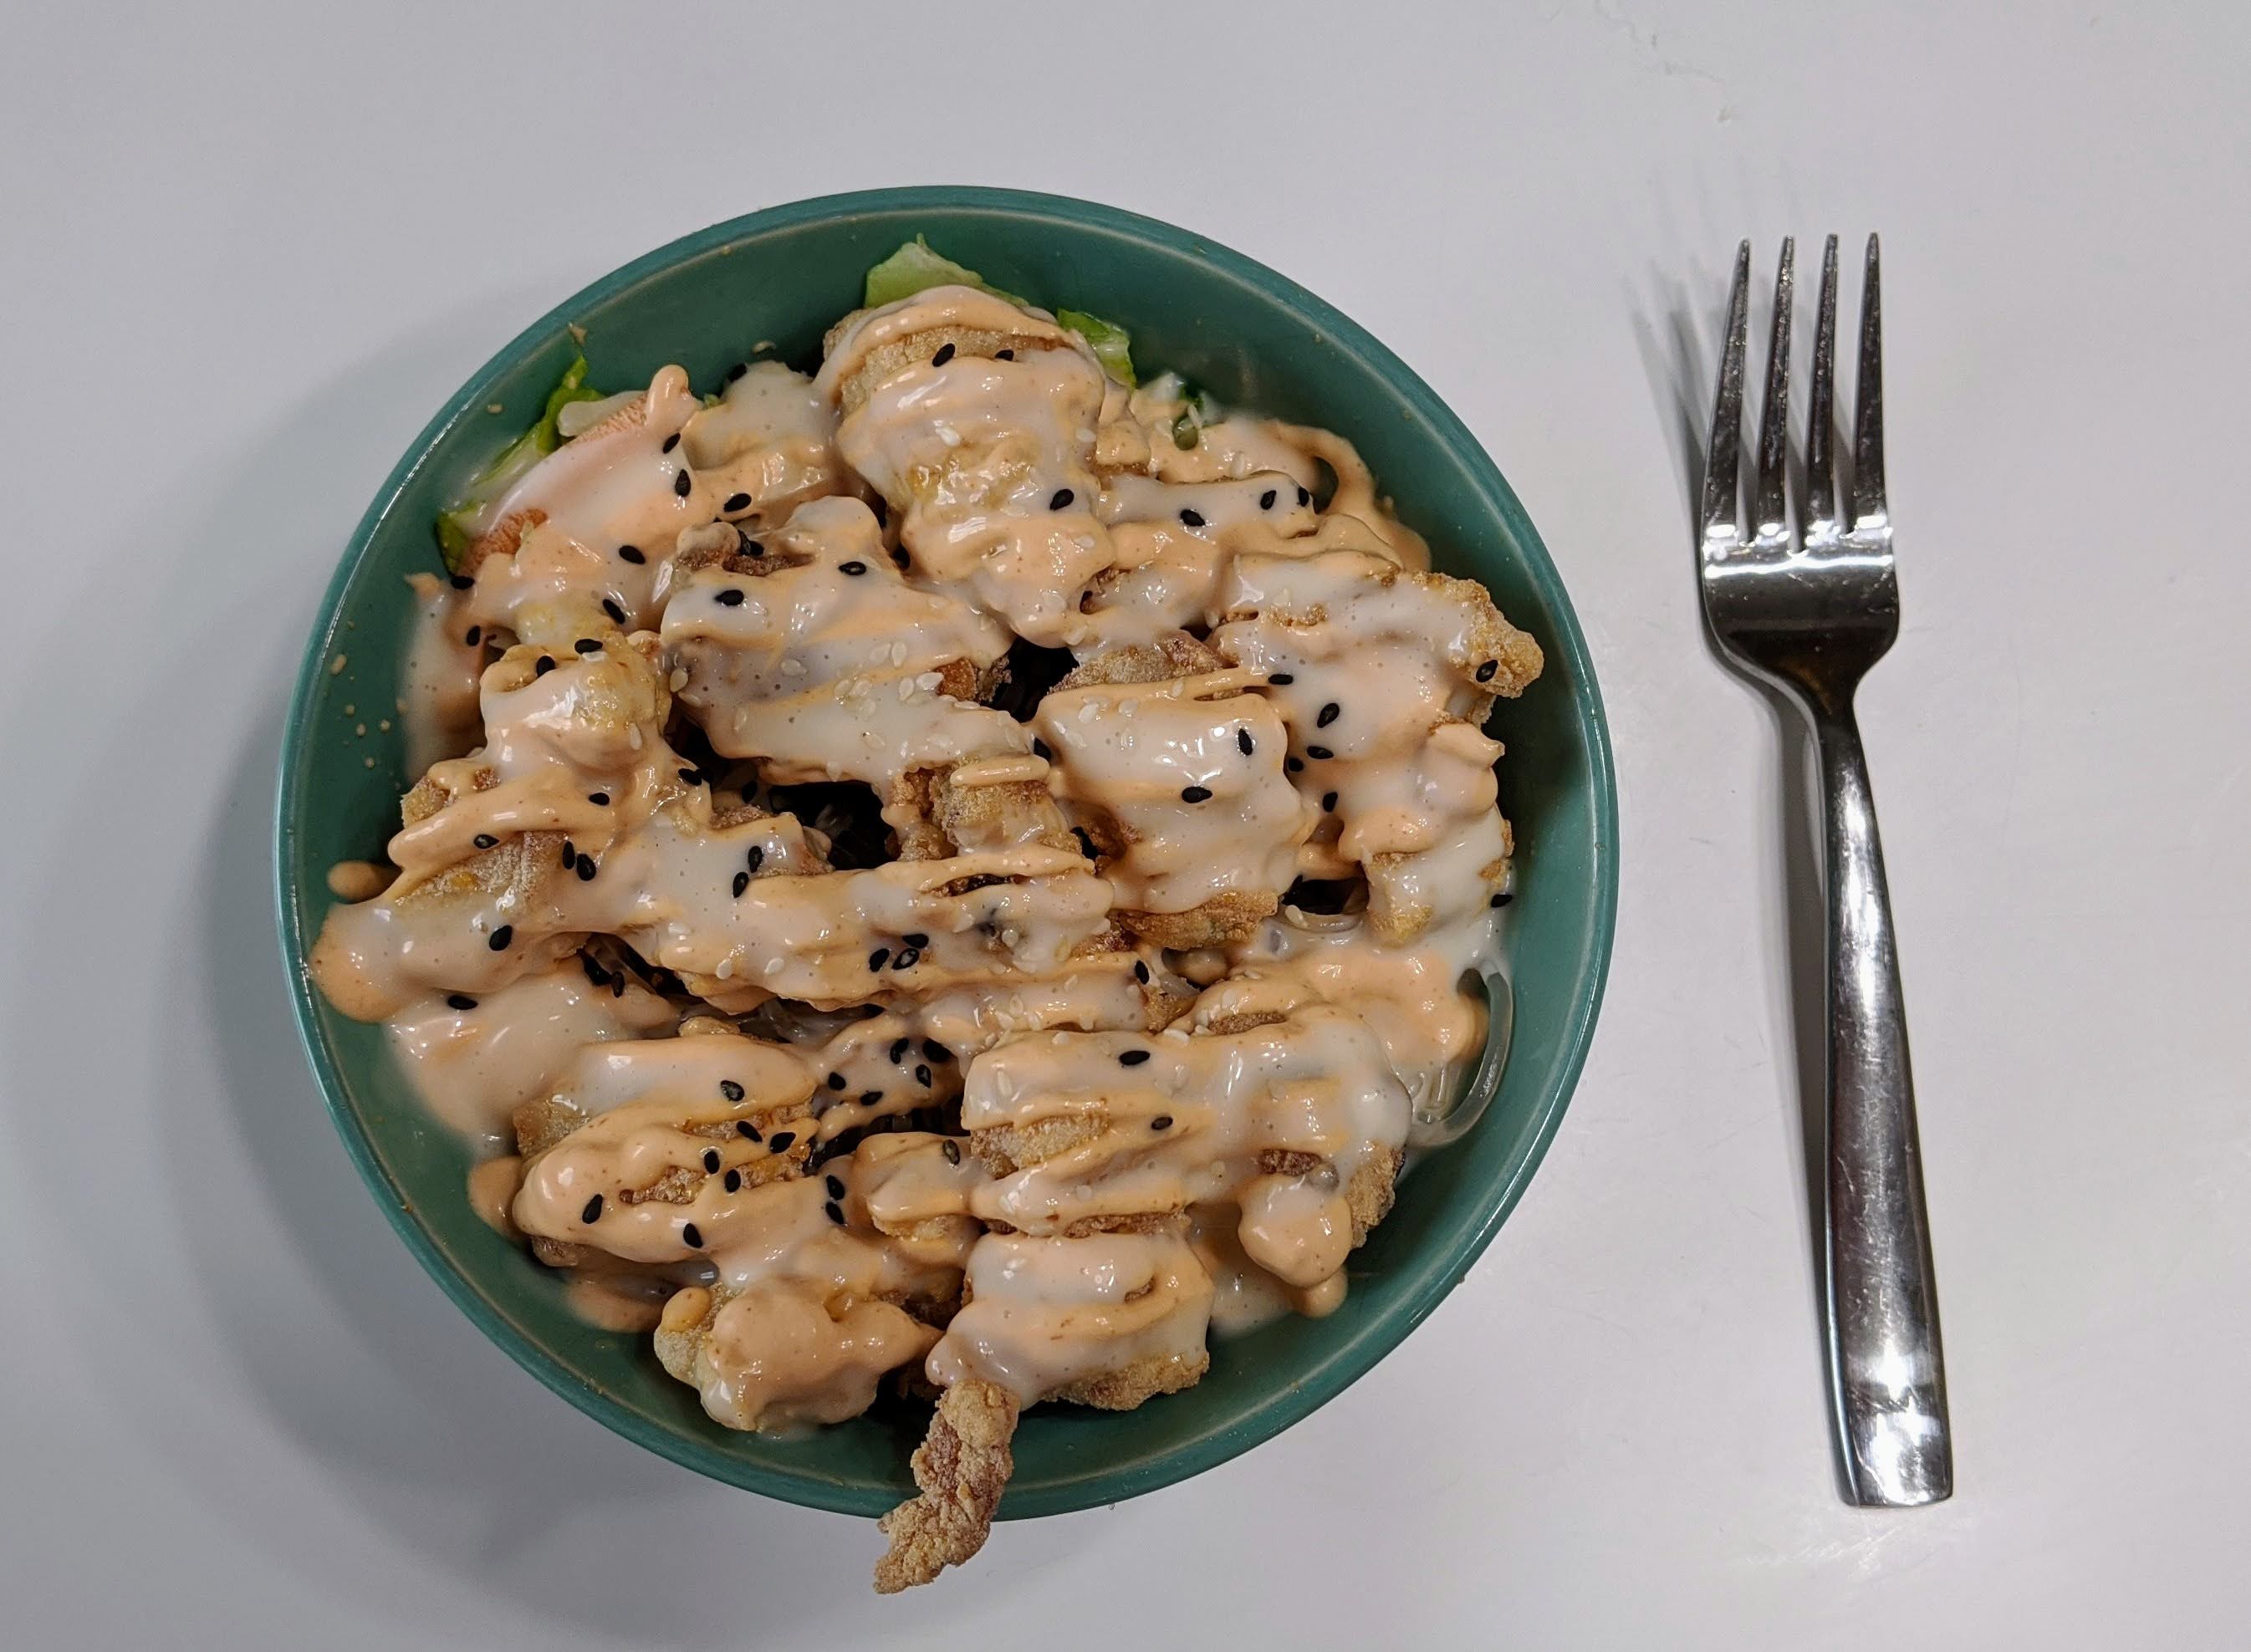
Be generous with all sauces, but not so much it puddles at the bottom. For the top two sauces, put more than you think you would from the picture. Cupbop’s sauces make the dish.
If you want to make your dish less sweet (holy smokes there is a ton of sugar in there), there’s definitely an opportunity to make the white lime sauce a little more tart (less sugar), and you could skip the sugar in the mochiko chicken mix. I haven’t tried the Buglogi sauce with less sugar, but it’s worth a shot, right? You could avoid the post meal coma.
Before creating your sauces, if you’re super serious about this, I highly recommend buying the sauces individually from Cupbop and comparing side by side when you’re creating from scratch. The only one I haven’t done this with yet is the Bulgogi, but my instructions are pretty close, and pretty tasty.
Last of all, and most importantly, support Cupbop! Buy their food often, single-handedly keep them in business. I do, and when we can’t make the long drive up to Orem (the best location), we make it at home.
If you need to reheat your fried chicken, you can throw them in an air fryer at 450°F for 4-5 minutes each side (8-10 minutes total). You can also put them on a baking sheet and reheat them in the oven or on a pan on the stove. I don’t know about the timing for those, but I’d guess 350°F for 10 minutes or medium heat until hot, respectively.